Sunday, August 23, 2009

Tinted Tail Lights!

I have been thinking about this for awhile and sadly its probably my last mod of the summer before school (I should really be packing instead of writing this lol). I saw on dude (owner of the "Danger Van") on the AFC who had tinted tail lights. It looked very cool indeed. I spent some hours researching what to use and do. I bought some VHT Night Shade spray paint (found here) and went to work! I pulled out the Tail lights (quite simple really just take off some bolts and pull 'er out)
here are the bolts to take off
Then I pulled it off and it looked like this:
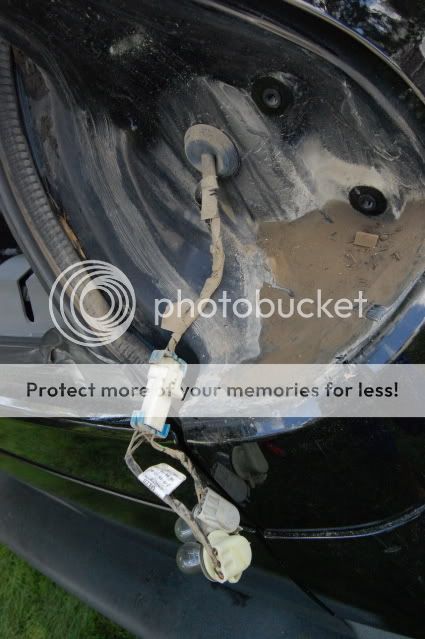
Then I taped off the tail lights where I did not want the paint to go. I left the back up light unpainted. After that I painted a thin layer, moving the car back and forth. It proceeded to do that about 2 times, waiting a half of an hour before the second layer. I actually held the car too close to the tail light on my first try and it ended up with a slight 'zebra' pattern (that is, a few dark lines are more visible if you study it for a bit, and the paint formed a few darker puddles). But I actually like that one better, it gives it more character.


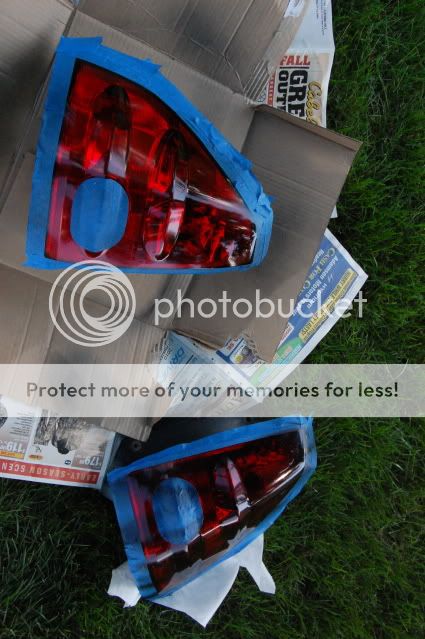
I really am satisfied with the results. I hope that it does not come off in a carwash, it shouldnt. I was going to clear coat it but the guy at advance auto parts said I do not need a clear coat with Nite Shades. I would love to put a Manik Black Tail Light Guard over them but the world seems to have no more of those for a 'tek... sadly...

Here are some photos:
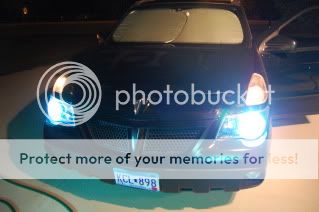
Before:
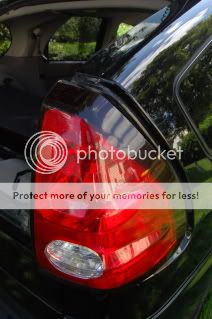
After ( its hard to tell from the photos b/c they were taken into the sun):


Saturday, August 22, 2009

Dome Light

So finally.. Finally I have my dome lights done. I bought some LED bulbs for my dome light a few weeks ago when I bought my HIDs and turn signals. The actual bulbs were the wrong ones. The stock bulbs had wire that wrapped around some metal tabs, and the LEDs I bought were cone shaped on the end. So I had to drill some holes to hold the LEDs in. However not just any drill would do, I had to go buy a 3/32 Carbon drill bit for drilling into heavy metal. This bit worked and now I have LED lighting in back! (oh and its red!). Also when I went to buy the drill bit I bought some VHT Nite Shade Black spray paint for.. drum roll... my tail lights =). I want to tint them a bit black. I also installed my turn signal bulbs but they hyper flash b/c the car thinks they are dying because LED bulbs use less power than halogens...

oh and I also added a darkish tinted license plate plastic cover to the front and it darkens the plate to match the car. It looks great!

Tuesday, August 18, 2009

122 Minutes and $171.10 Later...

Alright! So I ordered a HID kit the other day from v-leds and installed it tonight! It took me about 2 hours and now my lights are baller! I spent quite a few minutes trying to figure out the instructions until i figured i should just try and connect everything and that strategy worked quite well =)

i also tried to install my LED turn signals but i do not know how to wire the ballasts for it so i had to put the old ones back in.. oh and the LED red bulbs for my rear dome light do not fit either :angry: but i my HIDs do! =)

anywho, heres some pix! (for those of you who are HID-less and have no idea)
the photos make it look VERY blue, its more closer to a very clear white in real life. and i really like how far on the side it extends (see image)


Monday, August 10, 2009

Flaps for Mud

So I bought some mud flaps the other day off of amazon so that my lovely lil tek will be protected from all the salt in the winter.. They were only $30 total and installation was quite easy. Basically I lined up where I wanted them to be marked it. Then I drilled some holes in the flaps (and the car if necessary; front had holes already, back didnt) and then screwed the mud flaps on!

Here (Powerflow 6401 Pro-Fit Splash Guards-Car. 1 pair) are the ones I bought on amazon. I was fairly satisfied, however there is a crevice on them where dirt and stuff can build up when kicked up from the wheel. They fit nicely though and hopefully will last awhile.

Here are some photos...


Finished product:


me holding the flap in one hand, camera in the other- before installed

the goods..


Friday, August 7, 2009

Purchased HIDs...


Wow. So I spent a bit of dollars last night. I upgraded my lighting, I have been looking at HIDs vs Sylvannia Superstars Ultras for the headlights in my tek for awhile. I mean, com'on there is no way batman drove with crappy headlights. And my lights really suck; I found this out driving home from a twins game one night, my eyes were straining and knuckles white at the wheel... So yea I bought some HIDs from v-led
s through ebay. They look pretty legit. I also bought some other stuff too so I could save on shipping. I got somz red LED dome lights for the inside, LED turn signal bulbs (good ones too, because mine are sucky) and a resistor for the LED turn signals bulbs... All in all the whole kitten kabutool came to $200. Then I found a coupon code for v-leds on the interwebs; and saved $30! That was legit. So im stoked for my new headlights to come so I can put 'em in! They are blue and should last the car's lifetime. They are the kind that most caddys and beamers and stuff have- thus very legit.
Check some photos out:
HID 35W 6000 Blue Bulb Kit


Bought two of these 212 bulbs for the Dome lights on the interior, then the whole inside will be red!


Resistor to fool the DIC into thinking the bulbs are getting normal wattage
Nice Turn Signal Bulbs (pricey but I figured the $12 upgrade would be worth it)


Oh also the other day I bought mud flaps so that my car does not get salt and stuff on it from the winter. They came today and so I have to install them tomorrow. Although only the front two wheel wells have bolts or places to screw them in... So the back two might be a little bit improved..

Wednesday, July 22, 2009

installation of the d+p

so wow was installation a duzy. i started right after i got off work at about 5pm. I finished when it started to get dark around 8 or 830pm. i did break for dinner, but dont get me wrong it took a while. it really did not take all that long to install it but to wire the cables and it hooked up to the fuse box was tricky. oh and i failed to mention that i dropped a fuse down this gap in the car and i spent nearly an hour trying to fish it out. i failed and it is still down there somewhere. that was frustrating, but speaking of frustrating... i wanted to wire it directly into the car's fuse box so that it starts up and turns off. easier said than done... i spent nearly 2 of the hours trying to get this accomplished. it just would not get power, so i eventually ended up using the cigarette adaptor. i posted on the AFC and apparently i wired it to the wrong fuses.. oops, ill have to fix that sometime.

so it works great! its not Cd quality, one thing i was striving for but i guess i do have my whole library at my fingertips (literally) so i should not get spoiled. also its way more safer. also another reason its not perfect is that it seems like every station here in rural MN has something on it.. very disappointing... i have yet to mod the color of it. it is blue and the rest of the car's interior is red =( . i think i will try and put a jell in it from my job at school when i get there.

overall grade: satisfied.

Saturday, July 18, 2009

Now I can drive & play..

So today I got back from my mission trip to boonville arkansas. It was a totally great experience serving Christ and it was my first trip as an adult advisor.. When I came back the drive + play kit I ordered off amazon was sitting waiting to be installed! The parts that wire it directly into the stereo are in still in the mail so I just wired it up via FM transmitter. It is probably the best FM transmitter I have seen but still not near CD quality which is what I am looking for. I am actually sitting in my car right now rocking out and blogging and stuff... But it is truely amazing. I love the click wheel and little screen that mounts on the dashboard. It was really easy to put it in, but the tricky part will be wiring it into the stereo. Anyways great thanks goes to callforhelp62 from the 'tek fan club online. He (or she) helped me and convinced me to get one (totally worth it). He also posted an amazing tutorial on how to install it into the stereo. (link: http://www.aztekfanclub.com/SMF/index.php/topic,8227.0.html). I will try and take photos, might now happen, I am exhausted.